Getting started
Adding and verifying devices
Add devices to a Voltmasters EMS project with the Add Device wizard: device type, brand, model and the communication settings to verify.
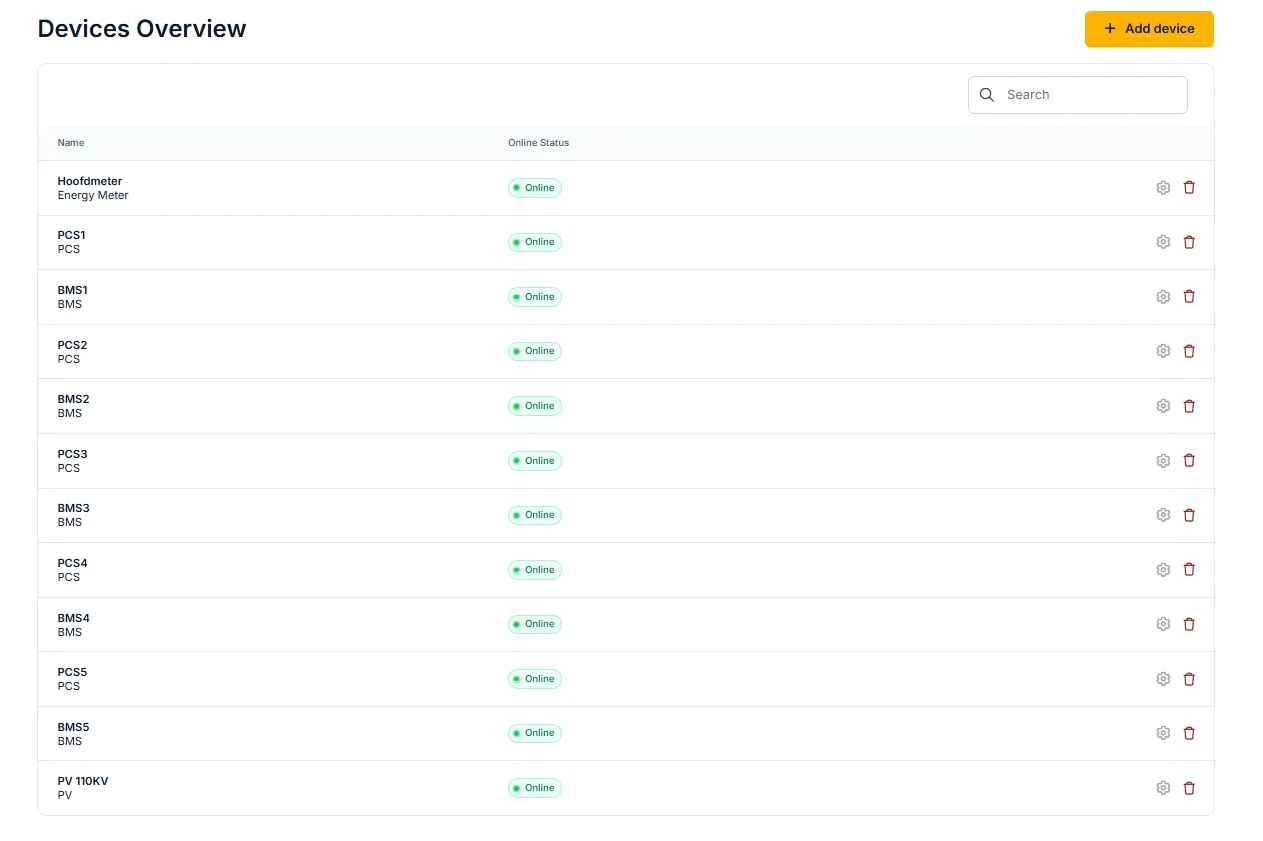
Open the devices overview
- Open your project in platform.voltmasters.be.
- In the project menu, go to Devices.
- This opens the device list, showing all configured devices and their online status.
- In the top-right corner, click Add device.
-
Add a new device
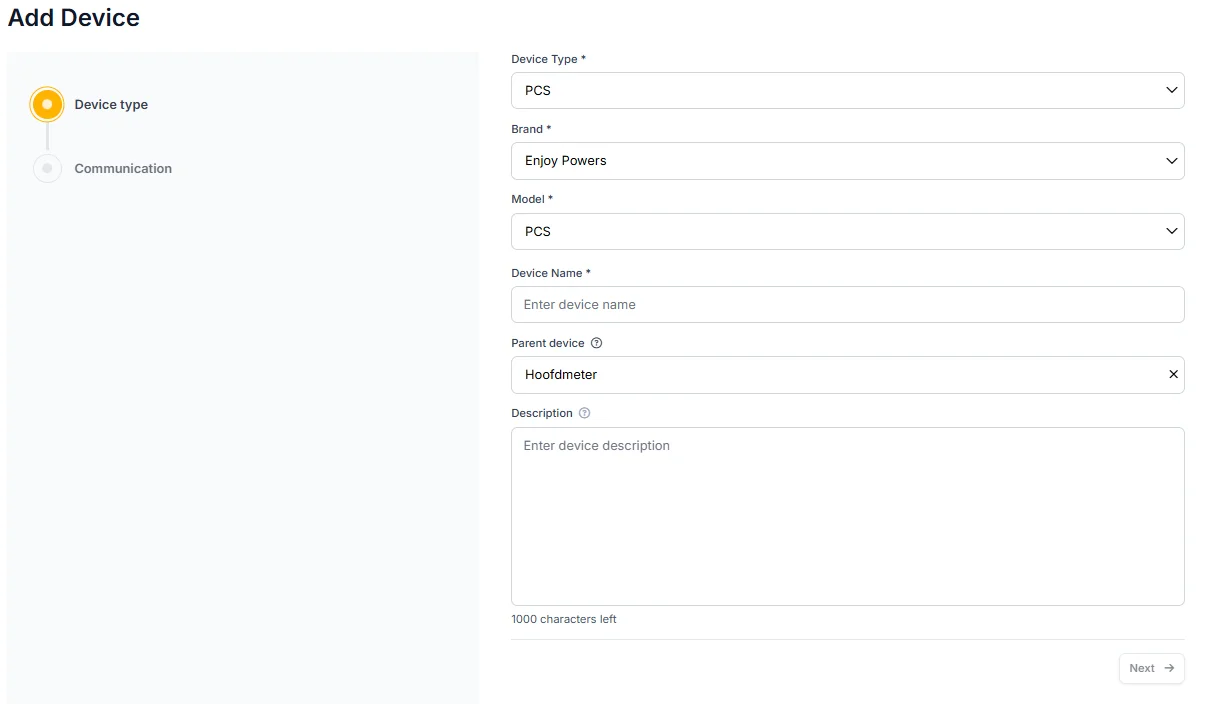
In the Add Device wizard, start with the device configuration:
- Device type: select the type of device you want to add, for example PCS, BMS, Energy Meter, or PV inverter.
- Brand: select the manufacturer of the device.
- Model: choose the correct model from the list.
- Device name: enter a clear and unique name, for example PCS1, BMS Rack 2, or Main Meter.
- Parent device: select the parent device in the electrical hierarchy, typically the main meter.
- Description: optional notes about the device or installation.
Click Next to continue.
-
Configure device communication
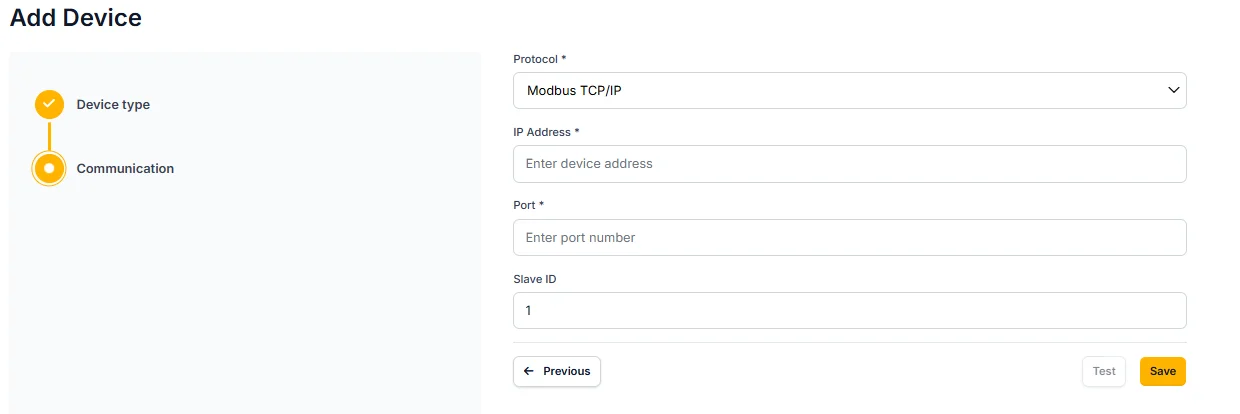
Define how the EMS communicates with the device:
- Protocol: select the communication protocol, for example Modbus TCP/IP.
- IP address: enter the static IP address of the device.
- Port: enter the communication port, commonly
502for Modbus TCP. - Slave ID: enter the Modbus slave ID. The default is often
1, unless specified otherwise.
Optional actions:
- Test: Click Test to verify communication before saving.
- Previous: Go back to adjust device details if needed.
Click Save to add the device.