Device integrations
Etrel AC charger
Supported devices: Inch Pro, Inch Duo.
Startup and connection
Once all wiring is complete, switch on the charger.
- Wait for Green: The green LED flashes during startup. Wait until it turns solid green; the charger is now ready for use. This LED is located just above the charger display.
- Open Web Interface: Connect your laptop to the same network as the charger. Enter the IP address (found on the sticker inside the maintenance door) into your browser.
Tip: Can't find the IP address? Press and hold the small reset button (inside the small door on the top right) until you hear a beep. This accesses the charging station settings. Navigate to the correct sub-menu on the screen to view the current IP address.
Settings and Modbus
Log in and go to the configuration page.
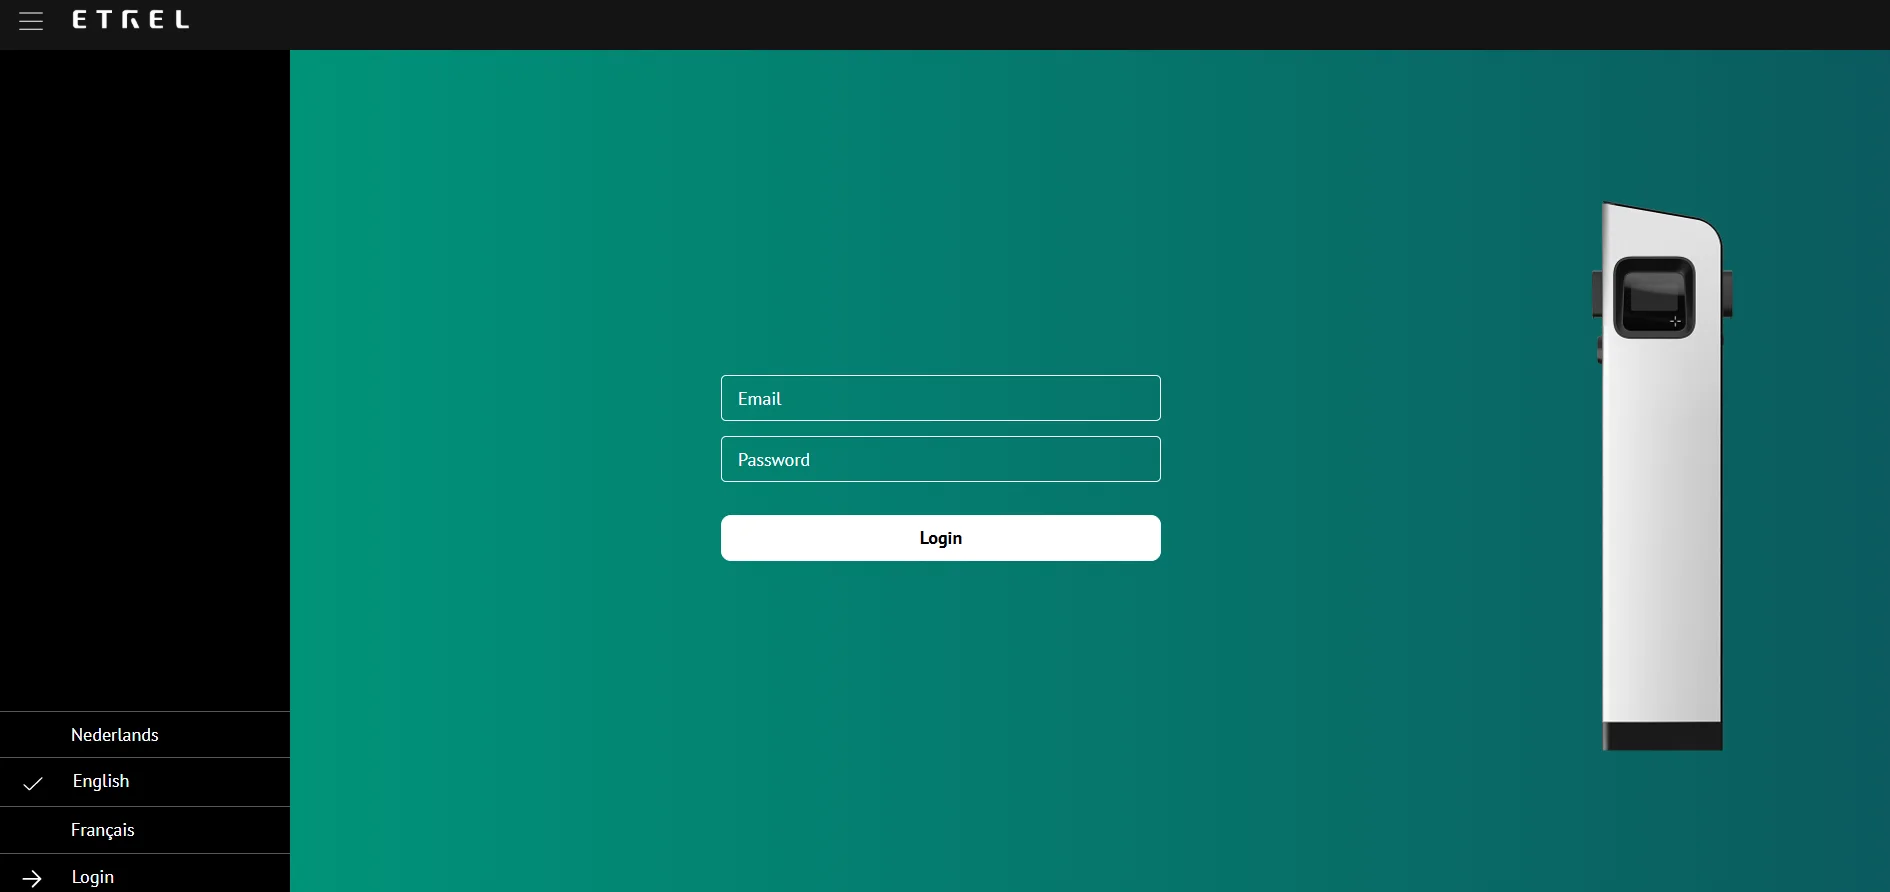
- Email: root@etrel.com
- Password: toor
- IP Configuration: Preferably set a static IP address within the same range as the Voltmaster Controller.
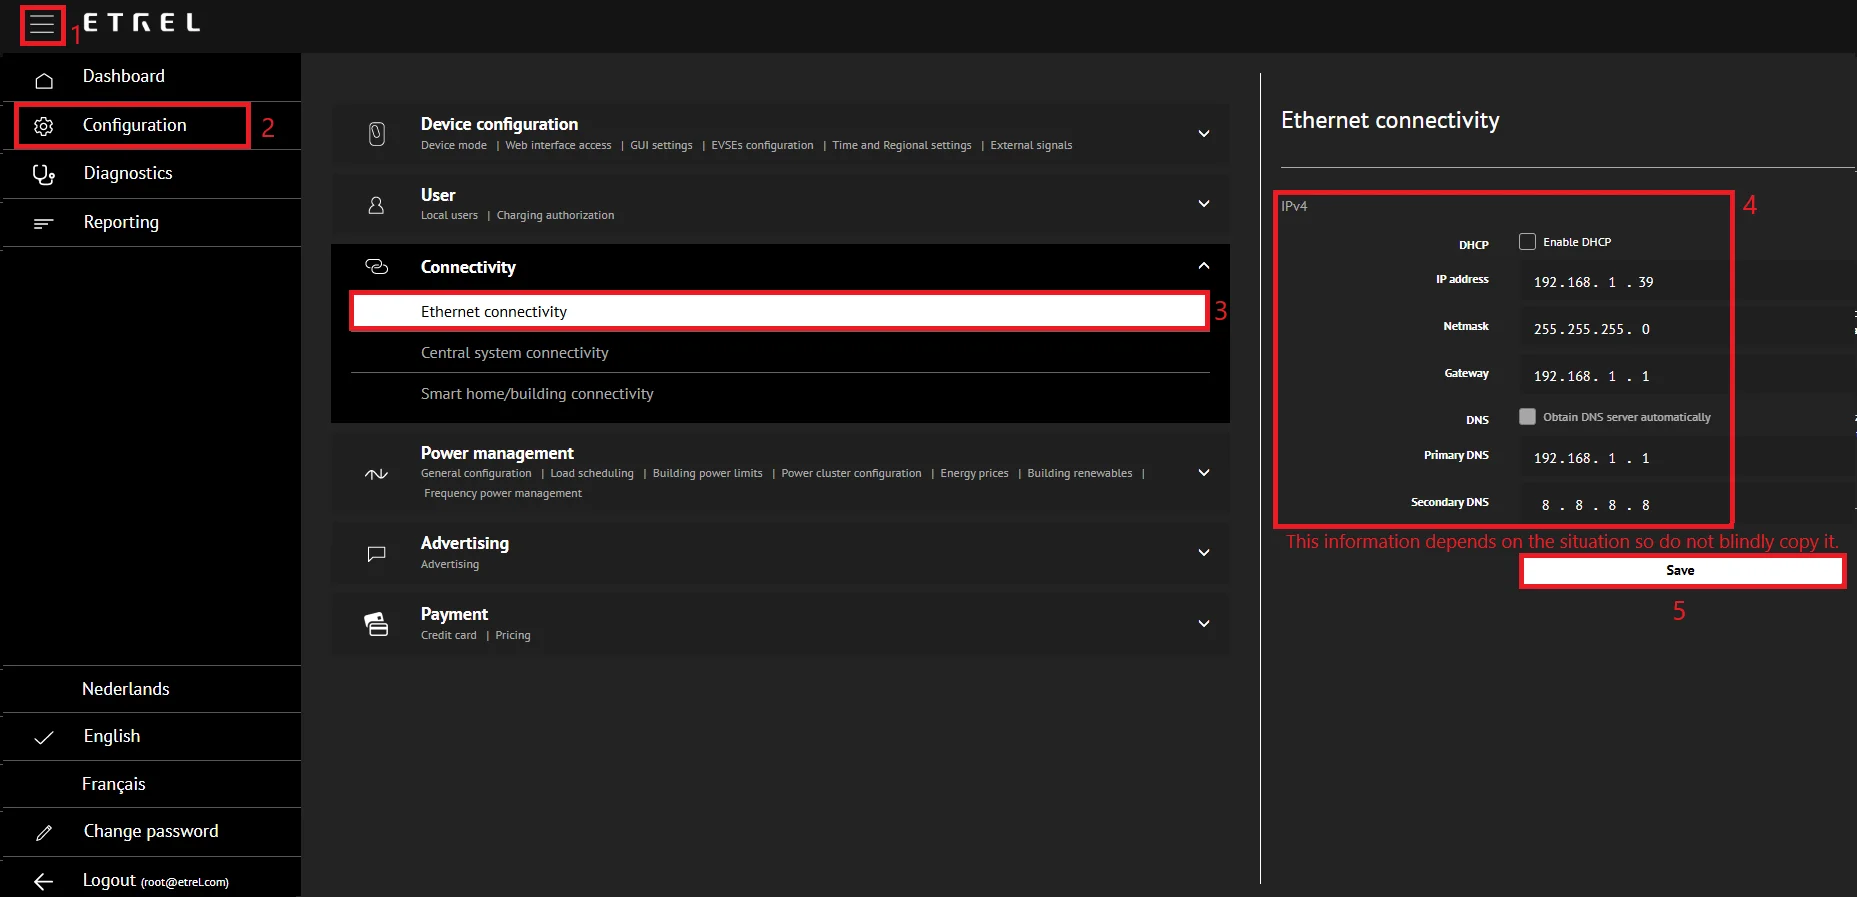
-
Enable Modbus: Go to the settings menu and activate Modbus TCP.
- Settings: Unit ID = 1, Port = 502.
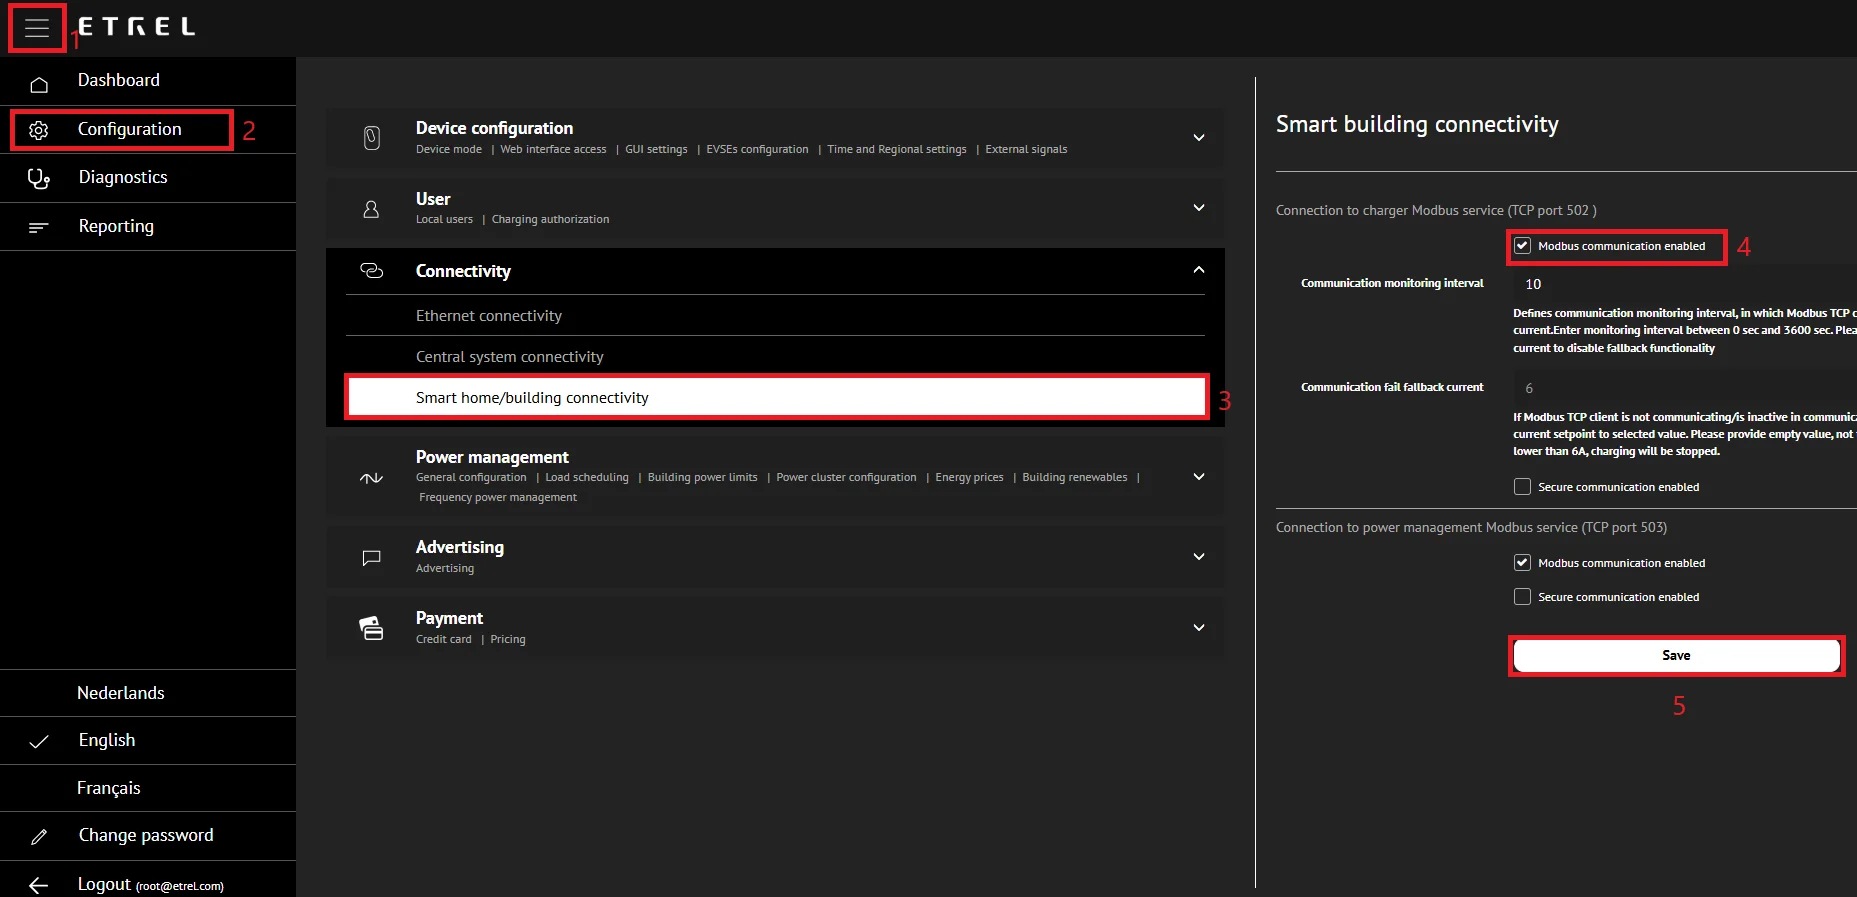
-
Firewall: Ensure Port 502 and Subnet 255.255.255.0 are open.
Restart the charger
Important: After changing the network or Modbus settings, you must restart the charging station to ensure the new configuration takes effect.
- Action: Reboot the charger via the web interface or by power cycling the unit.
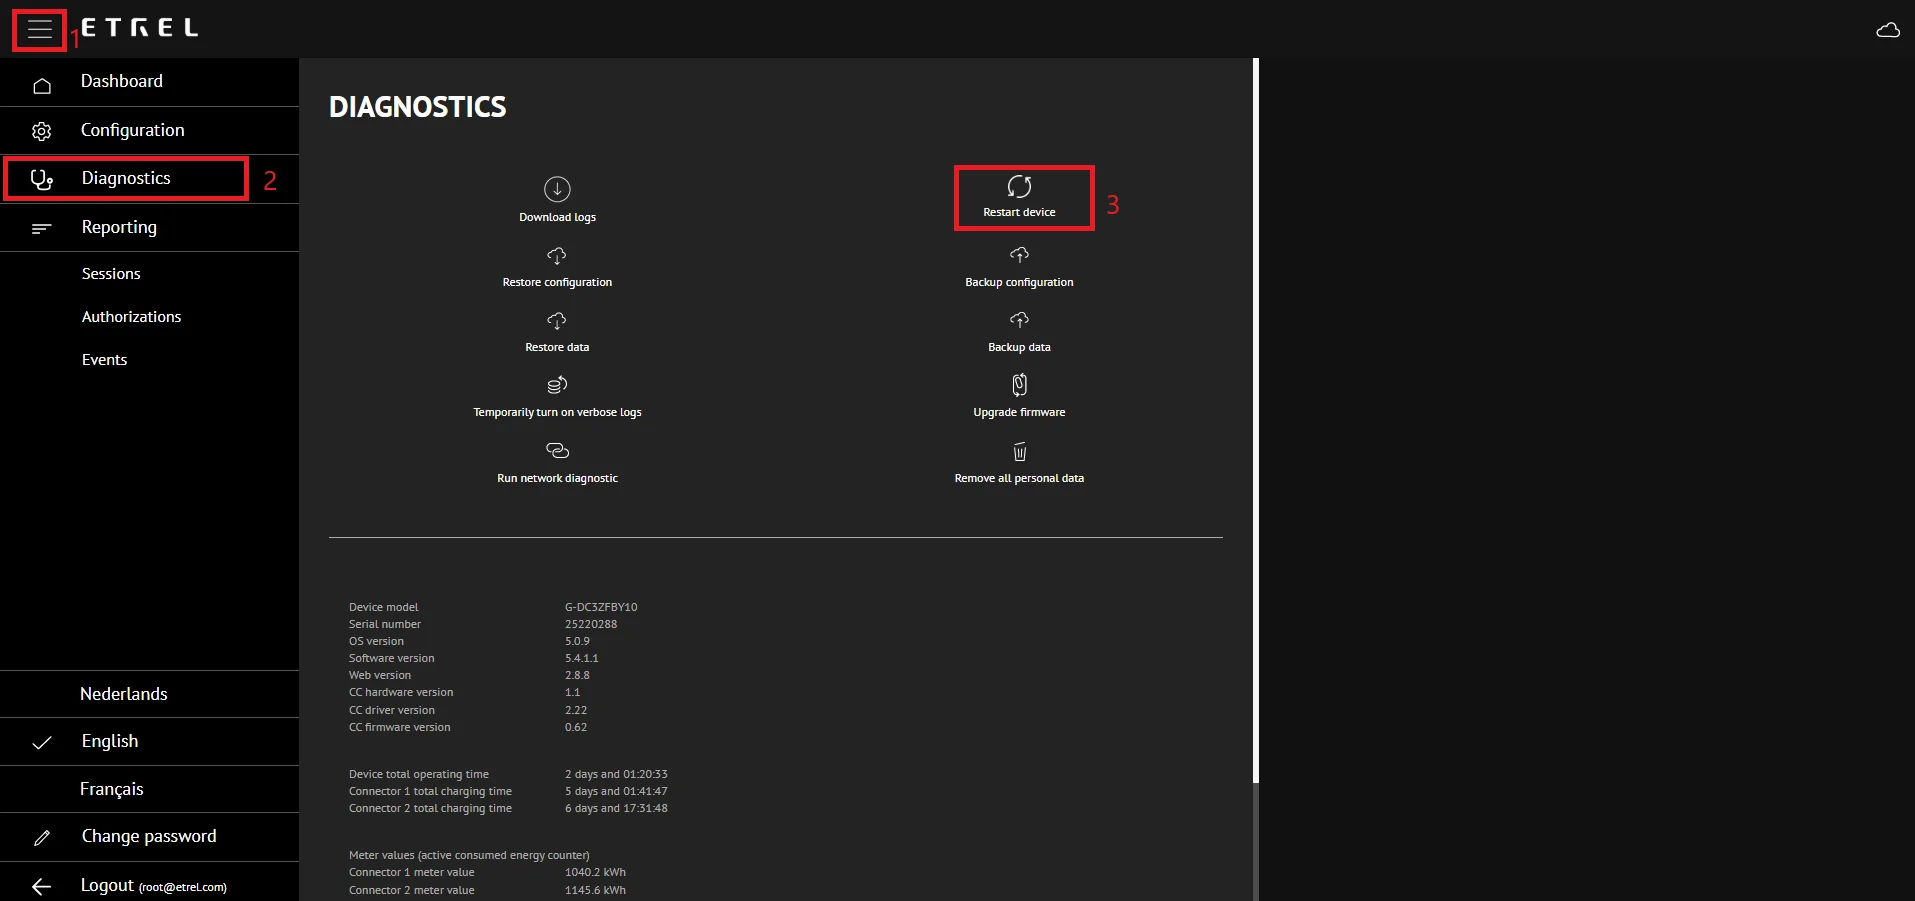
- Wait: Wait until the LED above the display turns solid green again.
Safety check and completion
- Protection: Verify that the Residual Current Device (RCD) and Miniature Circuit Breaker (MCB) are active.
Note: For Etrel INCH models without built-in protection, these must be installed externally in the main distribution board.
- LED Status Check (above Display):
- Green: Available.
- Flashing Blue: Charging in progress.
- Red: Error (inspection required).