Device integrations
BMR
Supported devices: PLA33 & PLA33RX
Configure the meter
We need this software to configure the BMR.

Open service mode
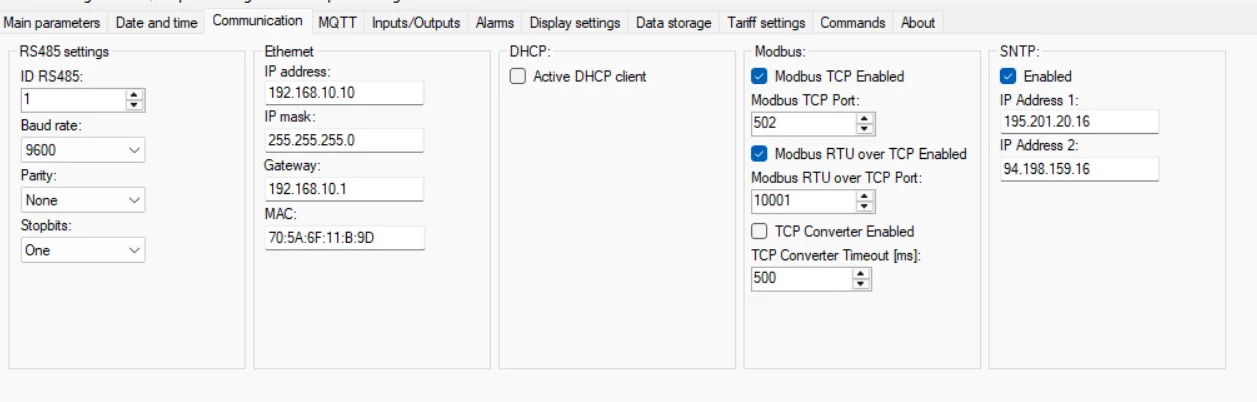
In most cases, the device is set to DHCP. However, it is still important to verify the CT ratio of the main measurement, to avoid incorrect main readings. Open the software and go to service mode.
If necessary, this can be adjusted in the Communication tab.
-
Write the configuration
Next, we click “Write configurations” twice, search for the configured IP address, and enter it.
-

Set the CT ratio
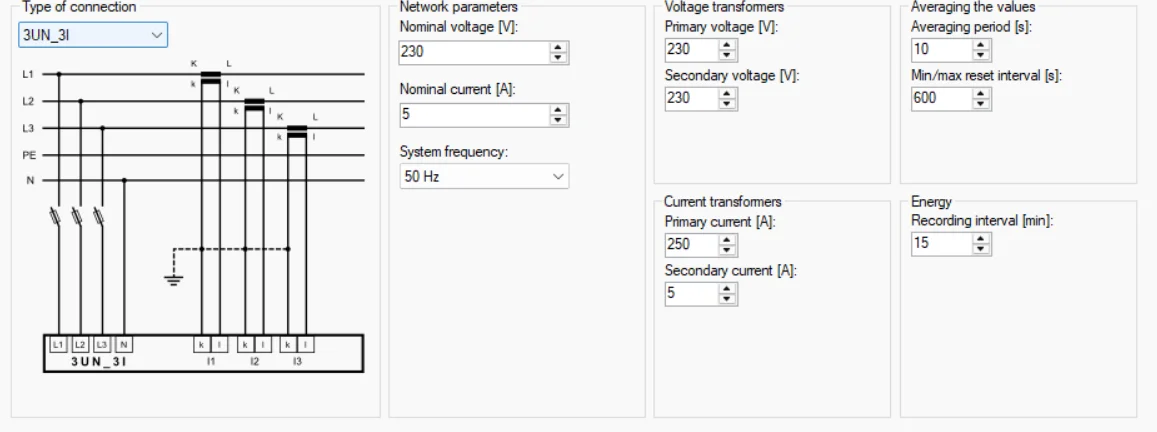
The last step, and the most important one, is to correctly configure the current transformers (CTs).
In our case, CTs with a ratio of 250/5 are used. This ratio can be read on the CTs installed on the main measurement, through which the power cable passes.
After that, we press “Write config” once more.
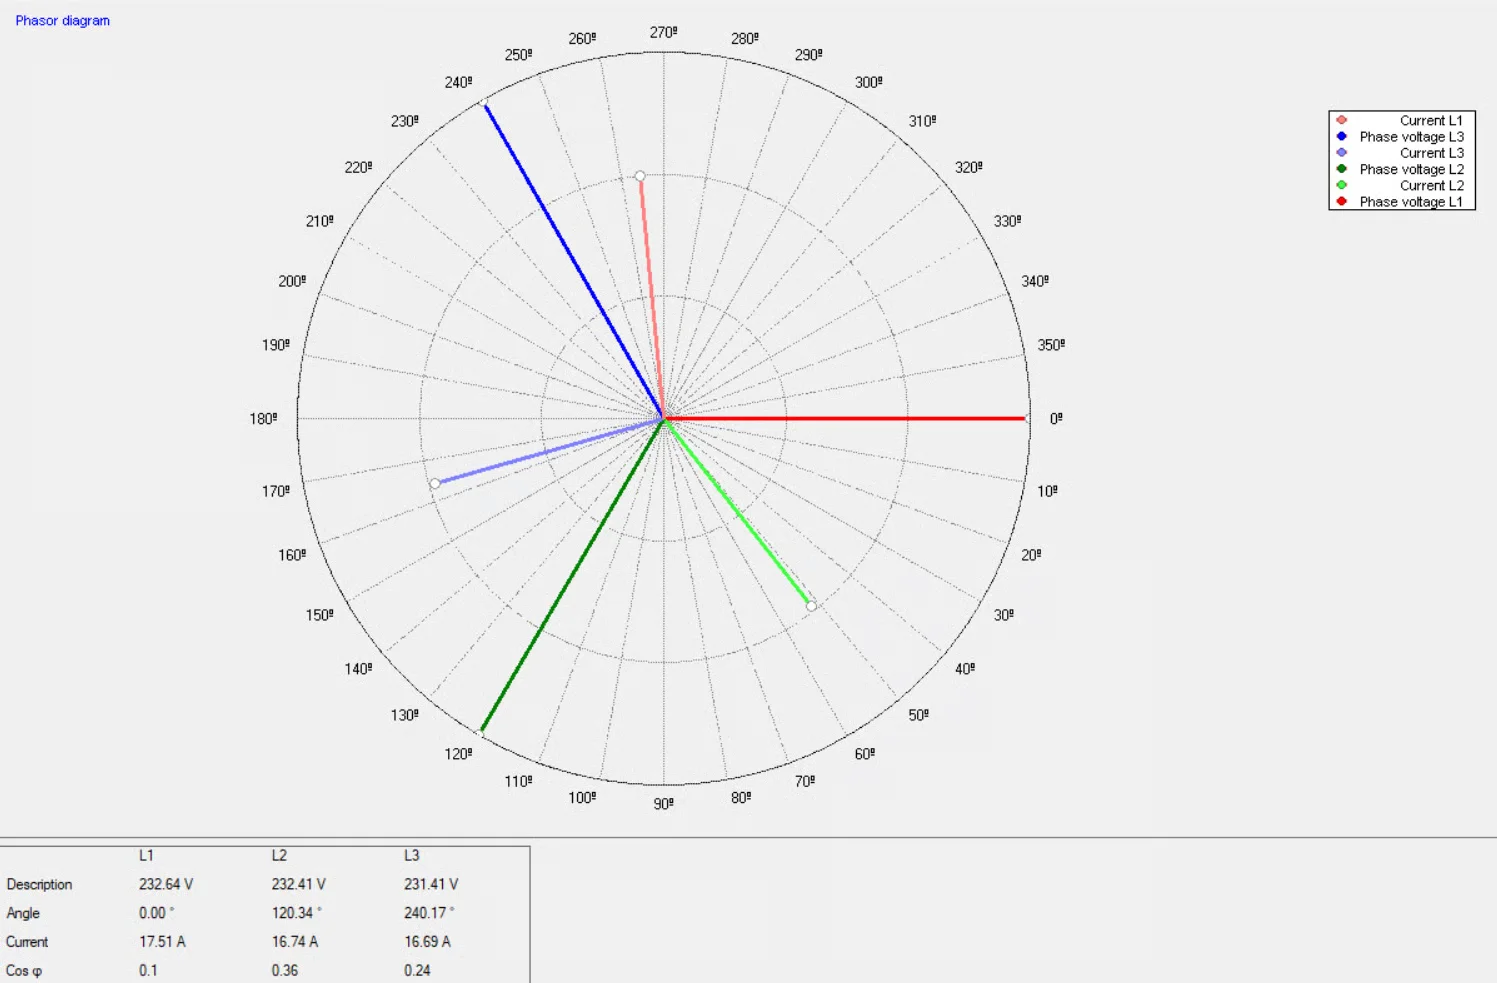
When checking the phasor diagram, all same-color vectors should be close to each other. In this case, they are not, because solar panels are installed at the site. It is recommended to temporarily switch off the PV system and confirm the measurement again. Otherwise, an installation error may occur.